Philips Sonicare UV-Reinigungsstation für Bürstenköpfe User Manual
Browse online or download User Manual for Computer Accessories Philips Sonicare UV-Reinigungsstation für Bürstenköpfe. Philips Sonicare UV-Reinigungsstation für Bürstenköpfe User Manual [en]
- Page / 60
- Table of contents
- BOOKMARKS
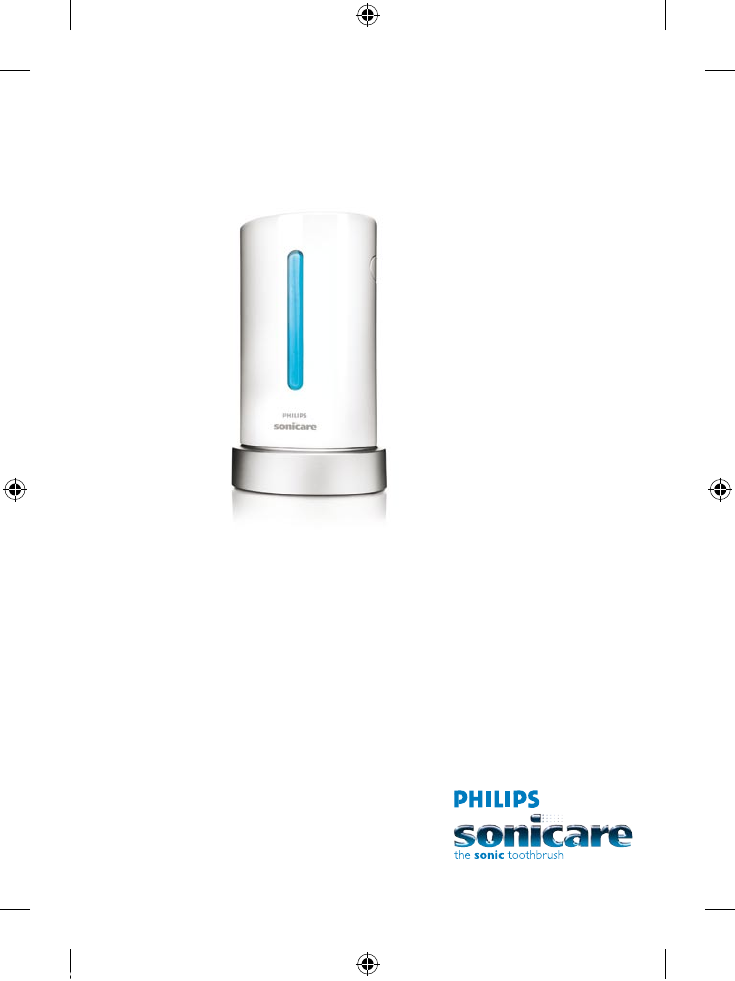
- UV Sanitiser 1
- ENGLISH 5 5
- ENGLISH6 6
- ENGLISH 7 7
- ENGLISH8 8
- ENGLISH 9 9
- ENGLISH10 10
- ENGLISH 11 11
- ENGLISH12 12
- ENGLISH 13 13
- ENGLISH14 14
- DEUTSCH16 16
- DEUTSCH 17 17
- DEUTSCH18 18
- DEUTSCH 19 19
- DEUTSCH20 20
- DEUTSCH 21 21
- DEUTSCH22 22
- DEUTSCH 23 23
- DEUTSCH24 24
- DEUTSCH 25 25
- FRANÇAIS 26
- FRANÇAIS 27 27
- FRANÇAIS28 28
- FRANÇAIS 29 29
- FRANÇAIS30 30
- FRANÇAIS 31 31
- FRANÇAIS32 32
- FRANÇAIS 33 33
- FRANÇAIS34 34
- FRANÇAIS 35 35
- FRANÇAIS36 36
- ITALIANO 37
- ITALIANO38 38
- ITALIANO 39 39
- ITALIANO40 40
- ITALIANO 41 41
- ITALIANO42 42
- ITALIANO 43 43
- ITALIANO44 44
- ITALIANO 45 45
- ITALIANO46 46
- ITALIANO 47 47
- NEDERLANDS 48
- NEDERLANDS 49 49
- NEDERLANDS50 50
- NEDERLANDS 51 51
- NEDERLANDS52 52
- NEDERLANDS 53 53
- NEDERLANDS54 54
- NEDERLANDS 55 55
- NEDERLANDS56 56
- NEDERLANDS 57 57
- NEDERLANDS58 58
Summary of Contents
UV Sanitiserwww.philips.com/support© 2007 Philips Oral Healthcare, Inc. All rights reserved.PHILIPS and the Philips shield are registered trademarks o
Using the applianceDonotplacethetravelcaponthebrushheadduringsanitisation. 1 Afterbrushing,rinsethebrushheadandshakeoffexcessw
Cleaning and maintenanceDonotcleananyofthesanitiseraccessoriesinadishwasher.DonotcleanthesanitiserwhentheUVlightbulbishot.For opt
ReplacementReplacement parts are available through your Philips dealer or the Philips Customer Care Centre in your country.The parts available for ord
Department of Philips Domestic Appliances and Personal Care BV.Guarantee restrictionsThe terms of the international guarantee do not cover the followi
Problem SolutionMake sure the bristles point towards the UV light bulb.The bristles of my brush head change colour.Exposure to UV light may cause bris
15EinführungHerzlichen Glückwunsch zu Ihrem Kauf und willkommen bei Philips! Um den Support von Philips optimal zu nutzen, registrieren Sie Ihr Produk
WarnhinweisPrüfen Sie vor Inbetriebnahme, ob die Spannungsangabe auf der Unterseite des Reinigungsgeräts mit der örtlichen Netzspannung übereinstimmt.
Während und direkt nach dem Reinigungsvorgang ist die UV-Lampe heiß. Berühren Sie die heiße UV-Lampe nicht.Verwenden Sie den UV Cleaner nicht ohne den
Vor dem ersten GebrauchHinweis: Eventuell wird Ihr Reinigungsgerät mit vorinstallierter UV-Lampe geliefert. Gehen Sie in diesem Fall weiter zum Kapite
ReinigungsgerätsaufbeidenSeitenderUV-Lampe. 6 SetzenSiedenSchirmein,unddrückenSieihnnachunten,umihnimReinigungsgerätzuxieren.
214235.020.2838.1.indd 2 08-11-2007 16:14:45
4 SetzenSiedenBürstenkopfaufdenentsprechendenBürstenkopfhalter(siehe“AllgemeineBeschreibung”). 5 BringenSiedenlinkenBürstenkopfh
Das Gerät benutzenWährendderReinigungdarfsichdieSchutzkappenichtaufdemBürstenkopfbenden. 1 SpülenSiedenBürstenkopfnachGebrauchaus
Hinweis: Sie können den Reinigungszyklus anhalten, indem Sie auf die Ein-/Ausschalttaste drücken oder die Klappe öffnen.Reinigung und WartungDasGerät
trockenen Ort ohne direkte Sonneneinstrahlung aufbewahren. Mithilfe der Kabelaufwicklung können Sie das Netzkabel ordentlich verstauen.ErsatzErsatztei
Garantie und KundendienstBenötigen Sie weitere Informationen oder treten Probleme auf, wenden Sie sich bitte an Ihren Philips-Händler oder setzen Sie
Problem LösungDie UV-Lampe leuchtet nicht auf.Stellen Sie sicher, dass die Klappe richtig geschlossen ist.Überprüfen Sie, ob das Reinigungsgerät an ei
26IntroductionFélicitations pour votre achat et bienvenue dans l’univers Philips ! Pour proter pleinement de l’assistance Philips, enregistrez vos pr
27AvertissementAvant de brancher l’appareil, vériez que la tension indiquée à la base de l’assainisseur correspond à la tension secteur locale.Le cor
28Ne nettoyez pas l’assainisseur au lave-vaisselle.Ne touchez pas la lampe UV pendant et juste après le cycle d’assainissement, lorsqu’elle est chaude
29FRANÇAIS 29Avant la première utilisationRemarque : La lampe UV peut déjà être installée sur l’assainisseur à la livraison. Si c’est le cas, reportez
HX7990ENGLISH 4DEUTSCH 15FRANÇAIS 26ITALIANO 37NEDERLANDS 484235.020.2838.1.indd 3 08-11-2007 16:14:45
30 6 Insérezl’écranetfaites-leglisserdélicatementverslebasandelexerdansl’assainisseur. 7 Remettezleplateauégouttoir.Avant uti
31FRANÇAIS 31 4 Fixezlatêtedebrossesurlesupportdetêtedebrosseapproprié(voirlechapitre«Descriptiongénérale»). 5 Fixezlesupp
32 2 Suivezlesinstructionsindiquéesdanslasection«AssainissementdestêtesdebrosseSonicareProResults,Oral-BFlexisoftet Oral-BFlossA
33FRANÇAIS 33Remarque : Un cycle de nettoyage UV complet de 10 minutes doit être effectué an d’obtenir des résultats optimaux.Remarque : Une fois le
34 6 Remettezleplateauégouttoir,l’écrandeprotectionetlalampe(voirlechapitre«Avantlapremièreutilisation»).RangementSi vous ne comp
35FRANÇAIS 35Lorsqu’il ne fonctionnera plus, ne jetez pas l’appareil avec les ordures ménagères, mais déposez-le à un endroit assigné à cet effet, où
problème, contactez le Service Consommateurs de votre pays. Problème SolutionLe témoin de nettoyage UV clignote rapidement.La lampe UV doit être rempl
37IntroduzioneCongratulazioni per l’acquisto e benvenuti in Philips! Per trarre il massimo vantaggio dall’assistenza Philips, registrate il vostro pro
AvvisoPrima di collegare l’apparecchio, controllate che la tensione indicata sulla parte inferiore dell’igienizzatore corrisponda a quella disponibile
Non toccate la lampadina a raggi UV se incandescente.Non mettete l’igienizzatore in funzione senza lo schermo protettivo per evitare il contatto con u
4IntroductionCongratulations on your purchase and welcome to Philips! To fully benet from the support that Philips offers, register your product at
Prima di utilizzare l’apparecchio per la prima voltaNota La lampadina a raggi UV dell’igienizzatore potrebbe essere già installata. In questo caso, ve
dell’igienizzatoresuentrambiilatidellalampadinaaraggiUV. 6 Inseriteloschermospingendololeggermenteversoilbassoinmododassarlos
4 Inseritelatestinaperspazzolinosulsupportoappropriato(vedereilcapitolo“Descrizionegenerale”). 5 Inseriteilsupportopertestine
Modalità d’uso dell’apparecchioNonposizionateilcappucciodaviaggiosullatestinadurantel’igienizzazione. 1 Dopounciclodipulizia,sciacqua
Nota Potete arrestare l’igienizzatore durante il ciclo di igienizzazione premendo il pulsante on/off o aprendo lo sportellino.Pulizia e manutenzioneNo
Come riporre l’apparecchioSe non prevedete di utilizzare l’igienizzatore per un periodo prolungato, scollegatelo, pulitelo e riponetelo in un luogo fr
Per contribuire alla tutela dell’ambiente, non smaltite l’apparecchio insieme ai riuti domestici, ma consegnatelo a un centro di raccolta ufciale.Ga
Problema SoluzioneIl LED UV di pulizia lampeggia rapidamente.La lampadina a raggi UV deve essere sostituita (vedere il capitolo “Sostituzione”).Non si
48InleidingGefeliciteerd met uw aankoop en welkom bij Philips! Als u volledig wilt proteren van de ondersteuning die Philips biedt, registreer uw pro
WaarschuwingControleer of het voltage aangegeven op de onderkant van de UV-reiniger overeenkomt met de plaatselijke netspanning voordat u het apparaat
WarningCheck if the voltage indicated on the bottom of the sanitiser corresponds to the local mains voltage before you connect the appliance.The mains
Maak de UV-reiniger niet schoon in de vaatwasmachine.Tijdens de UV-reinigingscyclus en direct erna is de UV-lamp heet. Raak de UV-lamp niet aan als de
Geen opzetborstelhouder nodig voor opzetborstels van de Sonicare e-serie.Voor het eerste gebruikOpmerking: Uw UV-reiniger is mogelijk geleverd met een
vandeUV-reinigeraanbeidekantenvandeUV-lamp. 6 PlaatshetschermenduwhetvoorzichtigomlaagtotdathetgoedvastzitindeUV-reiniger. 7
5 Bevestigdelinkeropzetborstelhouder(L)aandelinkerkantvandemiddenkolomtotdatueenklikhoort.Opmerking: De opzetborstelhouders passen
Het apparaat gebruikenPlaatstijdenshetUV-reinigennooithetbeschermkapjeopdeopzetborstel. 1 Spoeldeopzetborstelnahetpoetsenschoonens
Opmerking: U kunt de reinigingscyclus beëindigen door op de aan/uitknop te drukken of het deurtje te openen.Schoonmaken en onderhoudMaakdeaccessoire
OpbergenAls u de UV-reiniger langere tijd niet gaat gebruiken, trek dan de stekker uit het stopcontact, maak de UV-reiniger schoon en bewaar deze op e
Op die manier levert u een bijdrage aan een schonere leefomgeving.Garantie en serviceAls u informatie nodig hebt of als u een probleem hebt, bezoek da
Probleem OplossingHet UV-reinigingslampje knippert snel.De UV-lamp moet worden vervangen (zie hoofdstuk ‘Vervanging’).De UV-lamp gaat niet aan.Zorg er
594235.020.2838.1.indd 59 08-11-2007 16:15:17
Do not operate the sanitiser without the protective screen in place to avoid contact with a hot bulb.If you have used the sanitiser for 3 UV clean cyc
UV Sanitiserwww.philips.com/support© 2007 Philips Oral Healthcare, Inc. All rights reserved.PHILIPS and the Philips shield are registered trademarks o
1 Placeyourngerinthedoorrecessontheright-handsideofthesanitiserandpullopenthedoor. 2 Removethedriptray. 3 Toremoveth
7 Reattachthedriptray.Preparing for useSanitising Sonicare e-series brush heads 1 Placeyourngerinthedoorrecessontheright-handside
5 Attachtheleftbrushheadholder(L)totheleftsideofthecentrepostuntilitclicksintoplace.Note: The brush head holders do not t pro
More documents for Computer Accessories Philips Sonicare UV-Reinigungsstation für Bürstenköpfe

Related products and manuals for Computer Accessories Philips Sonicare UV-Reinigungsstation für Bürstenköpfe
 (2 pages)
© 2020, manymanuals.com. All rights reserved. | 0.281 s |
 Manymanuals.com
 Manymanuals.de
 Manymanuals.fr
 Manymanuals.it
 Manymanuals.pl
 Manymanuals.cz
 Manymanuals.es
 Manymanuals-pt.com
Comments to this Manuals