Philips CMD310/05 User Manual
Browse online or download User Manual for Car media receivers Philips CMD310/05. Philips CMD310/05 User manual
- Page / 28
- Table of contents
- TROUBLESHOOTING
- BOOKMARKS
- Always there to help you 1
- Contents 2
- 1 Important 3
- Copyright 4
- Trademark notice 4
- 2 Your car audio 5
- Overview of the system 6
- 3 Before use 8
- Connector Connect to 9
- Mount into the dashboard 10
- 4 Get started 11
- Set the clock format 12
- Display the clock 12
- 5 Listen to radio 13
- Enable the RDS function 14
- Select a program type 14
- Receive trafc announcement 15
- Synchronize the system clock 15
- Use alternate frequencies 15
- 6 Use Bluetooth 16
- 7 Play from a USB 17
- 8 Listen to an 18
- 9 Use the dock 18
- Switch to landscape mode 19
- Switch to portrait mode 20
- Portrait mode 21
- Landscape mode 21
- 10 Adjust sound 22
- 11 Adjust system 23
- 12 Additional 24
- 13 Product 25
- 14 Troubleshooting 26
- 15 Glossary 27
- All rights reserved 28
- CMD310_05_UM_V3.0 28
Summary of Contents
Register your product and get support atwww.philips.com/welcomeAlways there to help youUser manual 1Manual del usuario 27Руководство пользователя 5
9EnglishENMount into the dashboard1 If the car does not have an on-board drive or navigation computer, disconnect the negative terminal of the car ba
10 EN6 Attach the trim plate. 7 Reconnect the negative terminal of the car battery.4 Get startedTurn onPress . » [WELCOME] scrolls.• To turn off
11EnglishENSet the clock1 Press and hold to access the system menu.2 Press repeatedly until [CLOCK] and the current time are displayed. » If the
12 EN5 Listen to radioSelect a radio regionYou can select a radio region that matches your location.1 Press and hold to access the system menu.2
13EnglishEN3 Press and hold a numeric button for three seconds. » The station is saved in the selected channel.4 Repeat steps 2 and 3 to store more
14 ENItem Program typeDescription24 JAZZ Jazz Music25 COUNTRY Country Music26 NATION M National Music27 OLDIES Oldies Music28 FOLK M Folk Music29 DOCU
15EnglishEN6 Use Bluetooth devicesWith this car audio system, you can listen to audio from a player or make a call through Bluetooth.Pair a deviceNot
16 EN7 Play from a USB storage deviceThissystemcanplay.mp3and.wmalesthatare copied onto a compatible USB storage device.Note •Philips does
17EnglishEN8 Listen to an external deviceYou can use the system to amplify the audio input that is transferred from an external device, for example,
18 EN2 Pull out the dock bracket until you hear a "click". 3 Flip the dock bracket upwards. 4 Press and hold RELEASE to loosen the hook
1EnglishENContents1 Important 2Safety 2Notice 22 Your car audio system 4Introduction 4What's in the box 4Overview of the system 53 Before u
19EnglishEN1 Turn the dock bracket anti-clockwise by 90 degrees. 2 Adjust the viewing angle. Switch to portrait mode1 Turn the dock bracket clock
20 ENUse the CarStudio applicationNote •To enjoy the latest features, update the application on your iPhone or iPod touch when an update message promp
21EnglishENStore the dock bracketNote •Before storage, make sure that you have unloaded your iPhone or iPod touch and pinched the hooks.1 Flip the do
22 ENEnable the full-range soundPress repeatedly to select one of the following settings.• [FULL ON]: Enable the full-range sound• [FULL OFF]: Use
23EnglishEN12 Additional informationReset the systemYou can reset the system to factory default settings. 1 Open the protective cover for the USB soc
24 EN13 Product informationNote •Product information is subject to change without prior notice.Power supply 12 V DC (11V - 16V), negative groundFuse 1
25EnglishEN14 TroubleshootingWarning •Never remove the casing of this apparatus.To keep the warranty valid, never try to repair the product yourself.I
26 EN • For some mobile phones, the Bluetooth connection may be deactivated automatically as a power-saving feature. This does not indicate any malfun
Specifications are subject to change without notice© 2012 Koninklijke Philips Electronics N.V.All rights reserved.CMD310_05_UM_V3.0
2 EN1 ImportantSafetyRead and understand all instructions before you use the device. If damage is caused by failure to follow instructions, the warran
3EnglishENPlease act according to your local rules and do not dispose of your old products with your normal household waste.Correct disposal of your o
4 EN2 Your car audio systemCongratulations on your purchase, and welcometoPhilips!Tofullybenetfromthesupport that Philips offers, register y
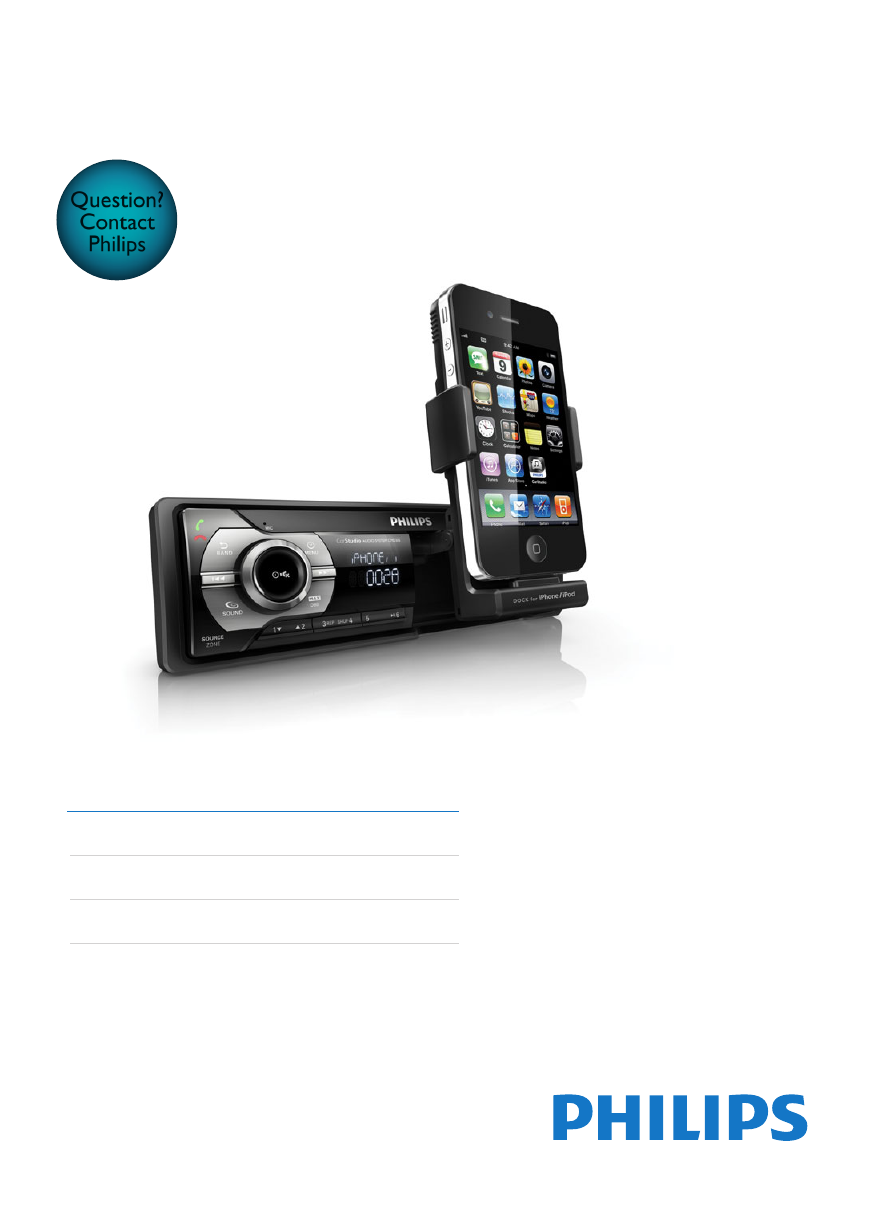
5EnglishENOverview of the system a • Press to answer or redial a call.• Press to hang up a call.b • Tune to a radio station.• Press to skip to the
6 ENi • In radio mode, press to select the preset radio station of No. 4.• In radio mode, press and hold to store the current radio station at chann
7EnglishEN3 Before useCaution •Use the controls only as stated in this user manual.Always follow the instructions in this chapter in sequence.If you
8 EN Connector Connect to1 Yellow wireThe +12V car battery which is live at all times2 Blue/White wireThe electric antenna control lead or power supp
More documents for Car media receivers Philips CMD310/05

Related products and manuals for Car media receivers Philips CMD310/05
 (28 pages)
 (28 pages)
 (70 pages)
 (25 pages)
 (2 pages)
 (4 pages)
© 2020, manymanuals.com. All rights reserved. | 0.947 s |
 Manymanuals.com
 Manymanuals.de
 Manymanuals.fr
 Manymanuals.it
 Manymanuals.pl
 Manymanuals.cz
 Manymanuals.es
 Manymanuals-pt.com
Comments to this Manuals